Configuration of the FileSystemClient
Software upgrade
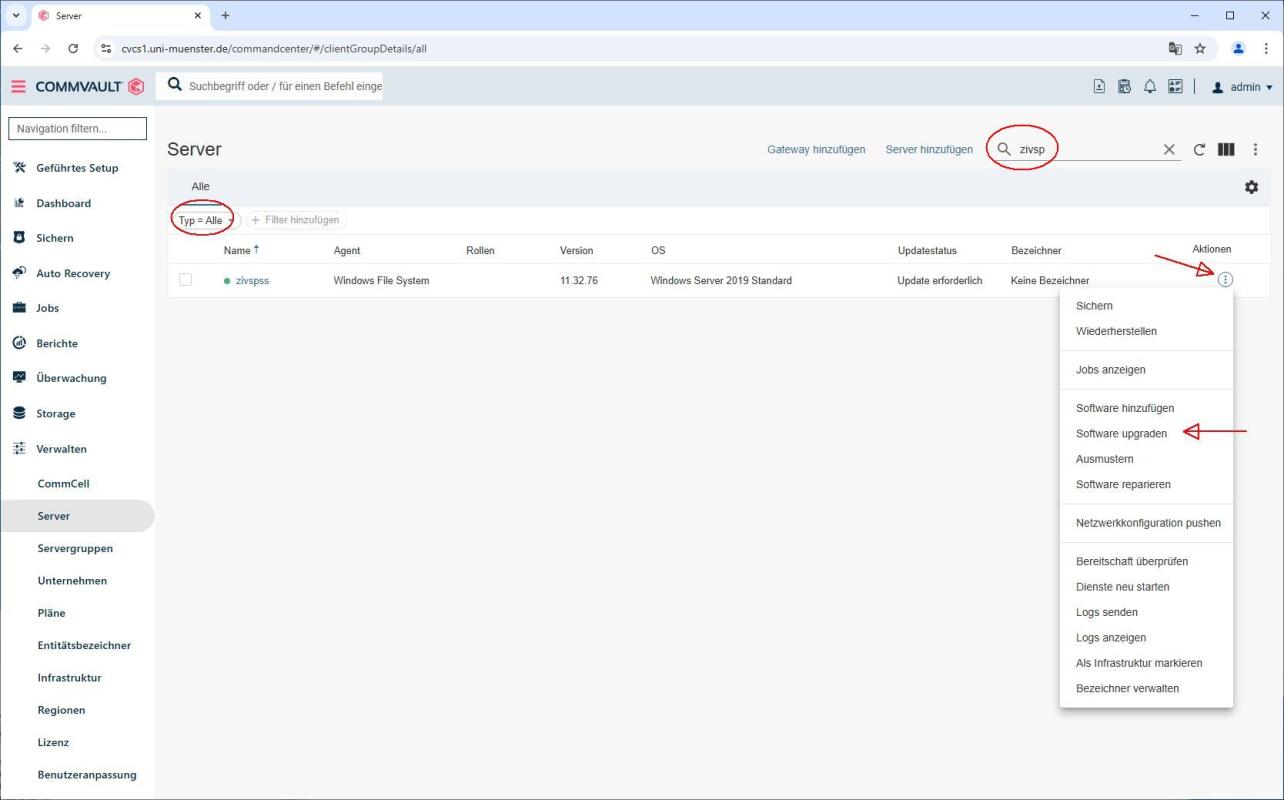
1. Upgrade software
After installing the Commvault client, an upgrade is possible. Here using the example of the client zivspss under “Manage -> Server”. If the client is not displayed, the filter must be set to “Type=All”. You can then select “Upgrade software” on the right under Actions. The upgrade of the client can take 3-5 minutes. The status of the job can be checked under Jobs.

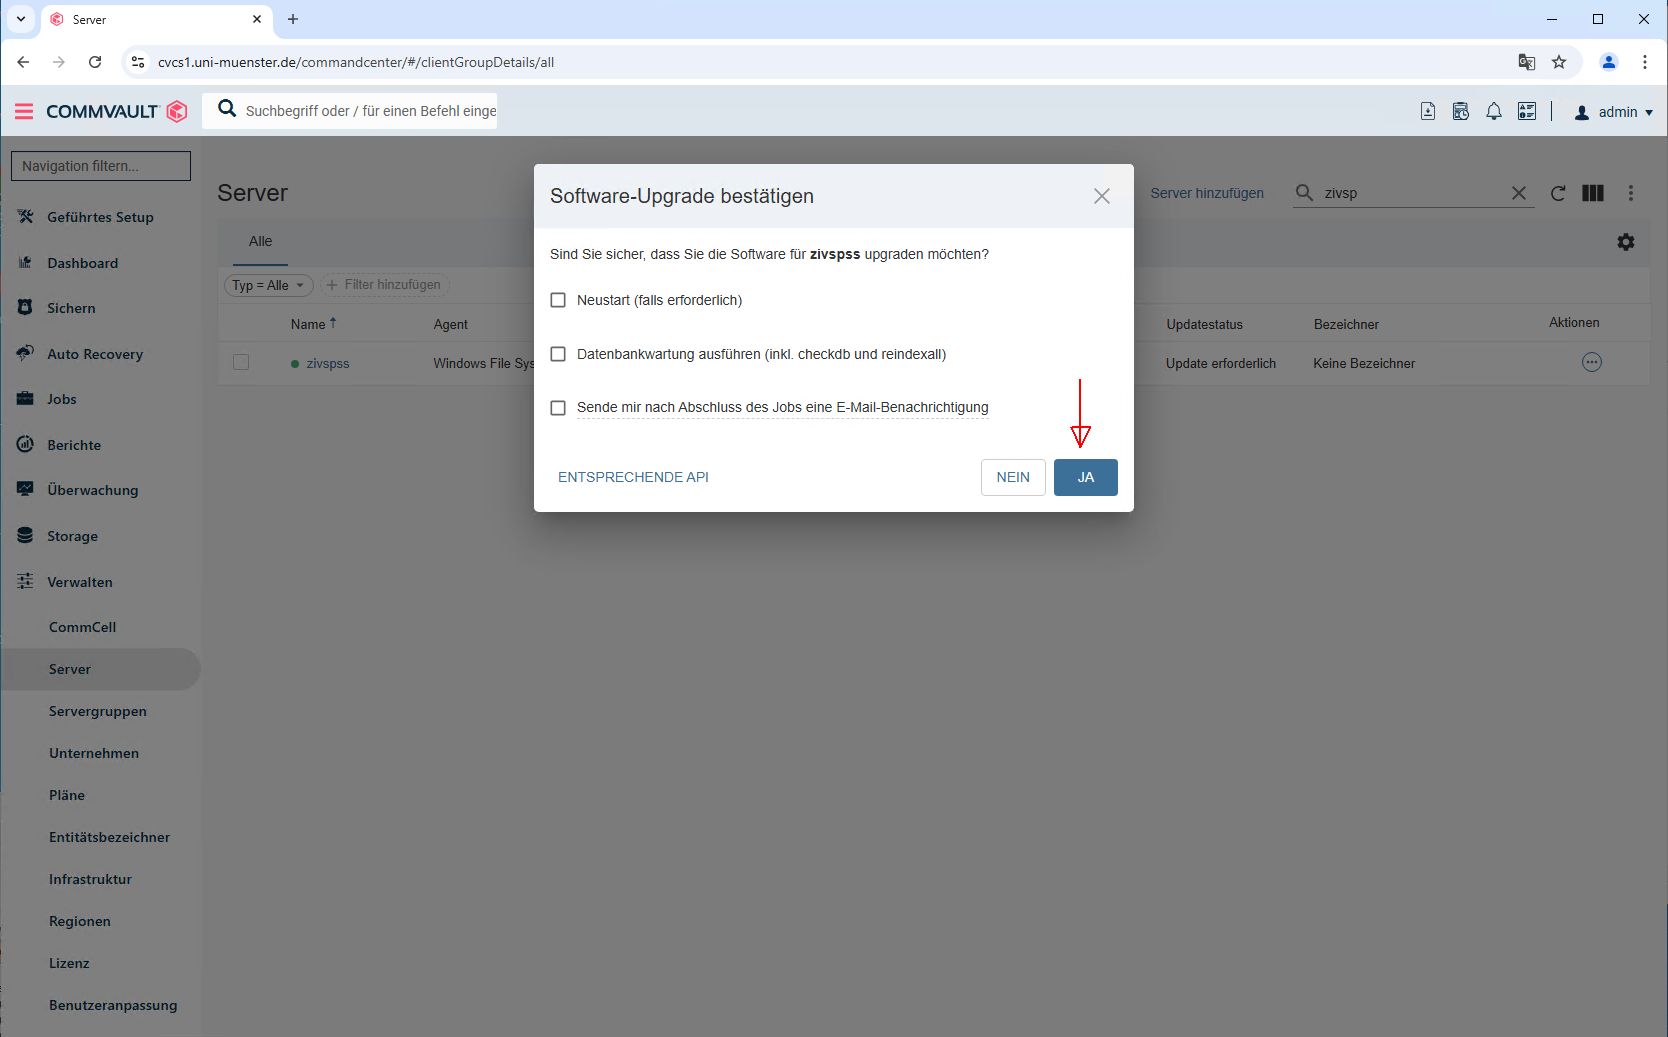
© CIT 2. Confirm upgrade
Afterwards, the software upgrade has to be confirmed. A reboot is usually not necessary.
© CIT Data backup
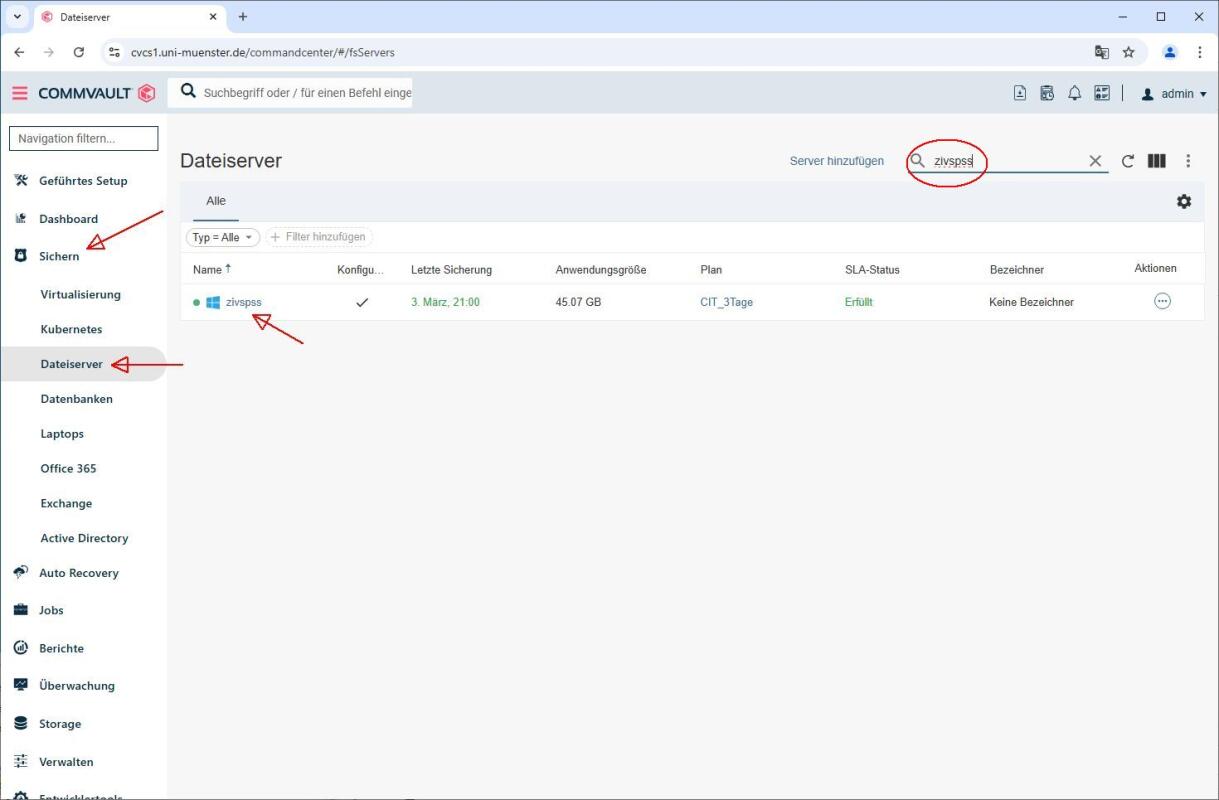
1. Server selection
Under “Backup -> File server” you can search for the server (here using the example of the server “zivspss”) for which the backup is to be configured. Click on the name of the server (zivspss) to call up the subclient configuration.

© CIT 2. Data selection
Here you can specify which data is backed up. In the default settings, all local data is backed up (\). Under the item Backup content, you can define more precisely what is to be backed up. By clicking on the “blue pencil” another window will open.

© CIT 3. Search local data
The local data to be backed up can be selected under “Browse”.

© CIT 4. Select path
In this example "C:" was selected. Meaning the entire "C:" drive is saved.

© CIT Set start time
1. Server selection
To set the backup start time of the client, navigate to the “Manage - Server” area. There you can search for the server name, e.g. “zivspss”. If the client is not displayed, the filter must be set to “Type=All”. Then click on the client name, here “zivspss”.

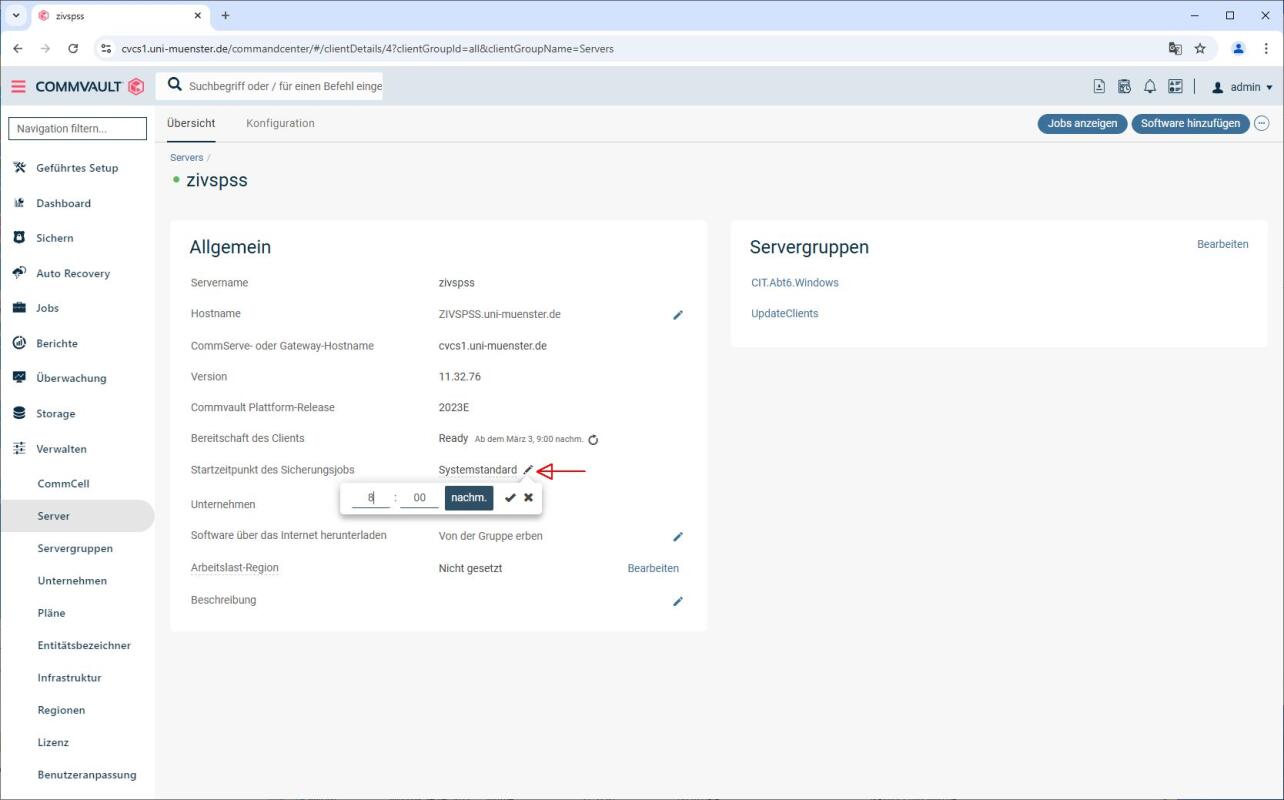
© CIT 2. Select startingtime
You can now specify the start time of the backup job under “General”. The default setting is 9 pm.

© CIT Data recovery
1. Select client
To restore files from a client, go to “Backup and file server” on the left. Here you select the client and then navigate to the restore points. Then select a restore point and click on “Restore”.

© CIT 2. Select restoration location
Select the data and the location where the data is to be restored. The data can be downloaded via the web browser or written back to the original machine. You can also select other clients for which you are authorized.

© CIT Configure warning messages
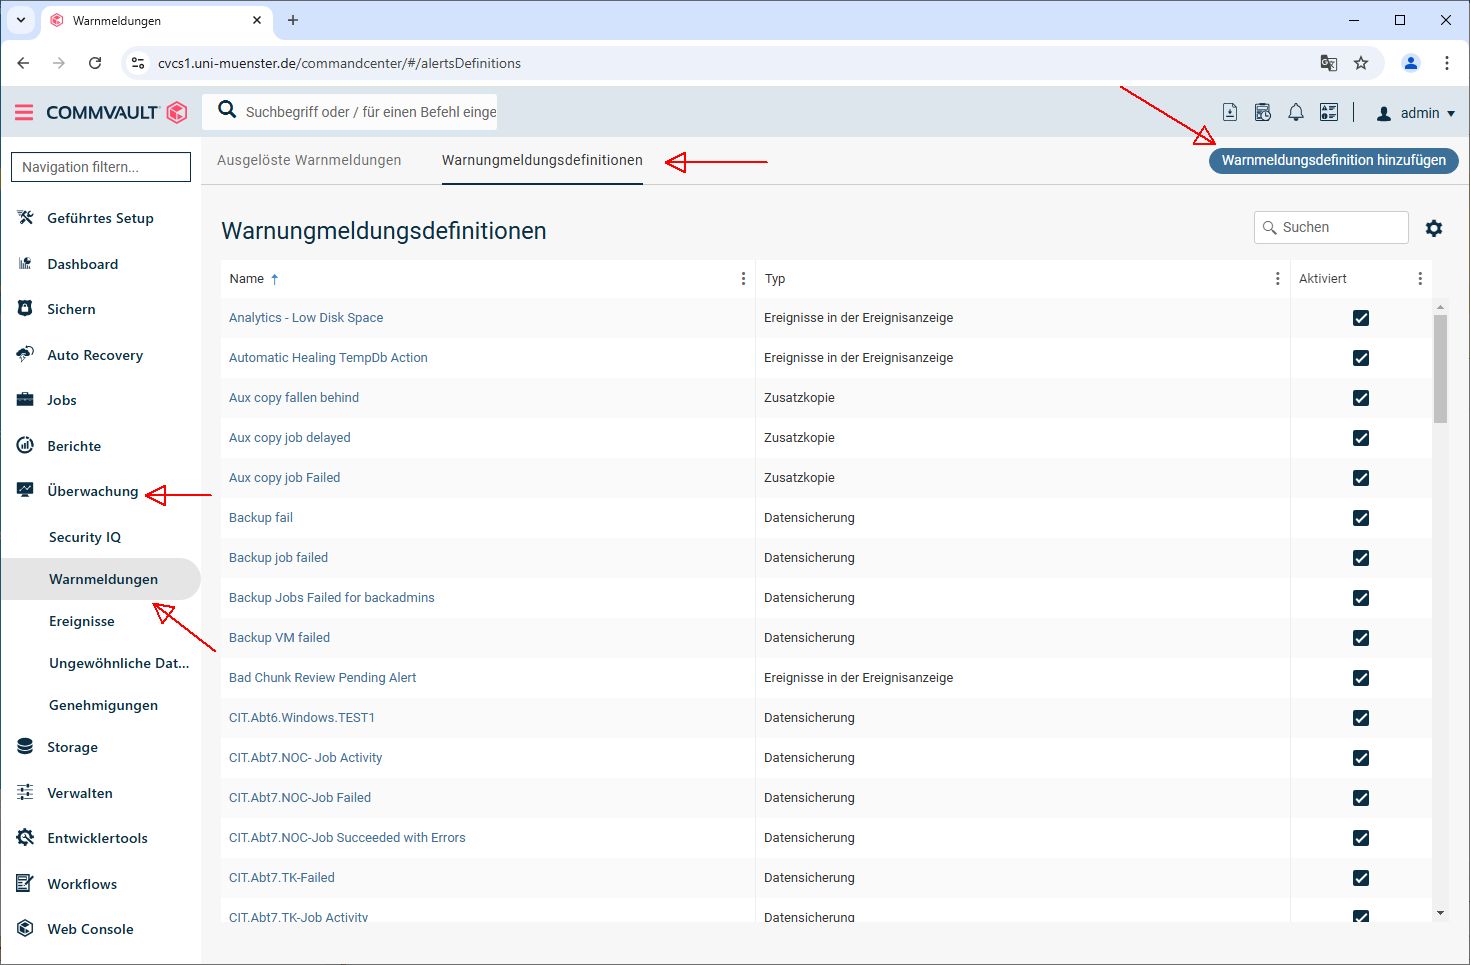
11. Adding warning message definitions
It is useful to receive emails if the backup has failed or there have been other problems. Warning message definitions are configured for this purpose. To create these, click on “Monitoring” on the left and then on “Warning messages”. In the new window, click on “Warning message definitions”. The “Add warning message definition” button then appears at the top right. If you click on this button, you can create a new warning message definition.
© CIT 2. Select name
Specify the name that the warning message definition should have here. Please place your group name in front of each warning message definition created. You can find your group name under “Manage -> Security -> User groups”. Example: IVVx.backup-not-running

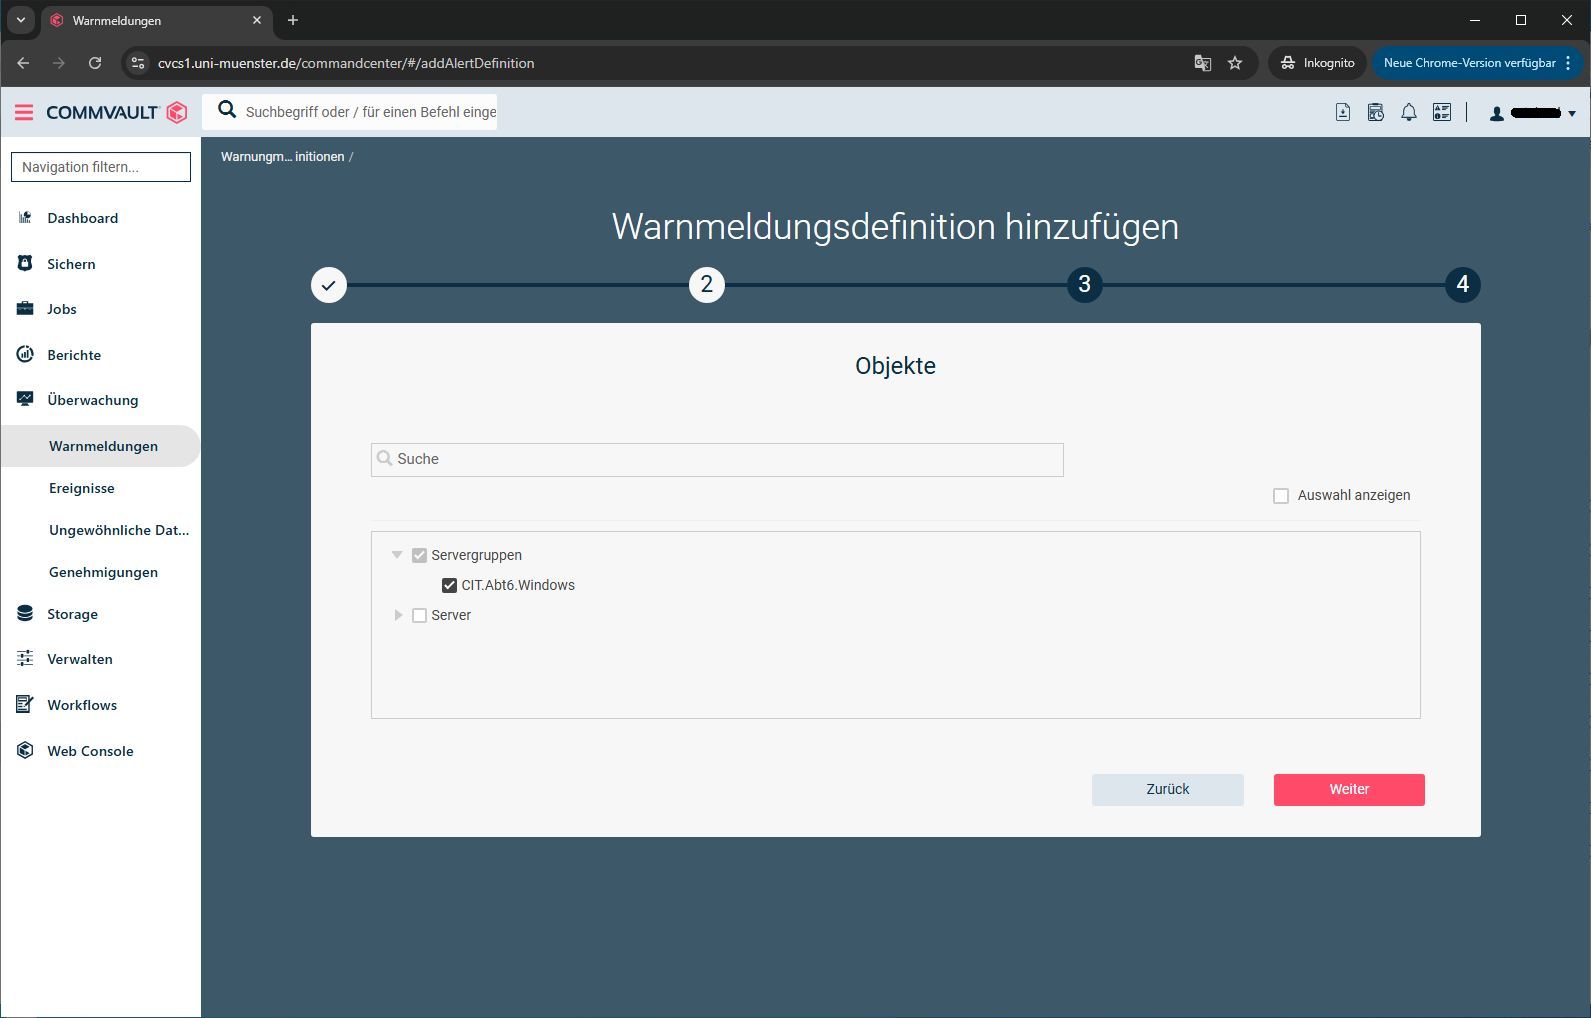
© CIT 3. Select server
In the next step, select the servers to which the rule should apply. Server groups can also be selected.
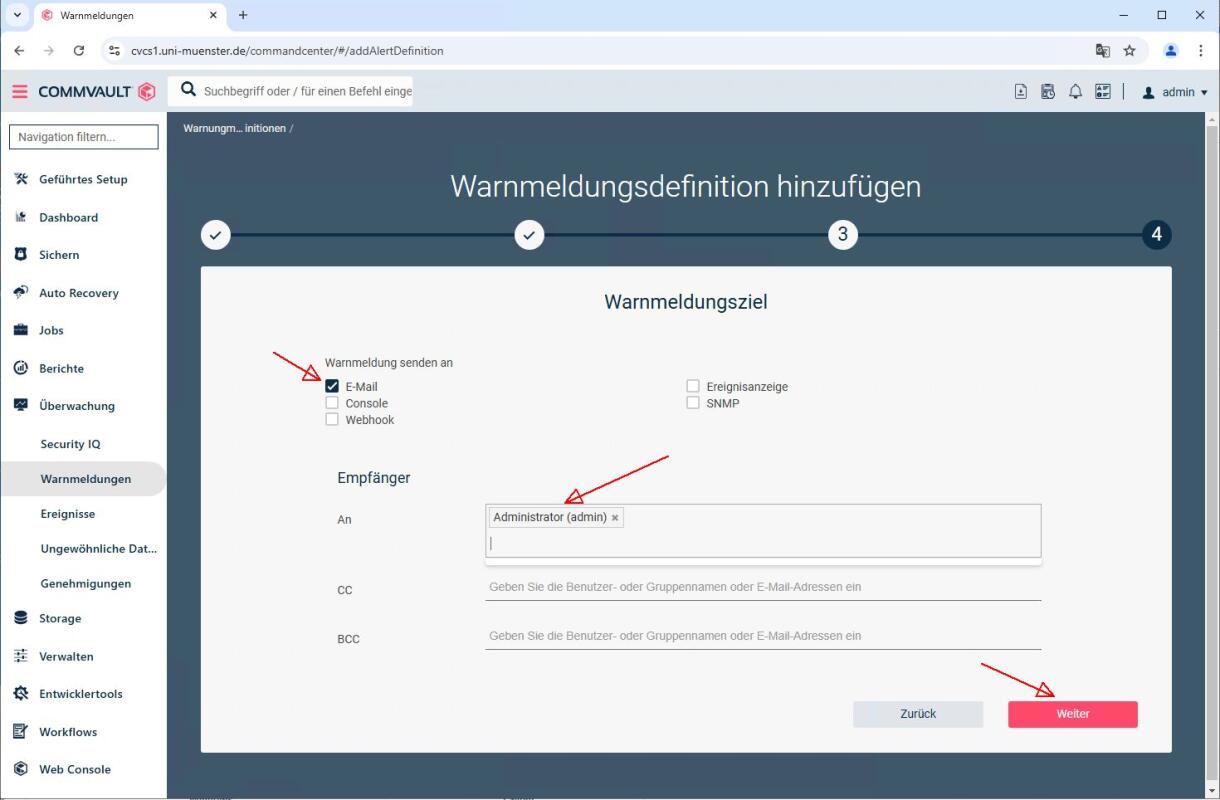
© CIT 4. Select mail adress
The installation is now complete. Unfortunately, it is not possible to add the client to the designated server group in the Commvault during the Windows installation. Please send us the information (client name, intended server group) to [email protected]. Once you have entered this information, you can manage the Commvault client.

© CIT 5. Adjustments
The template can then be adapted if necessary. The warning message definition is now complete and active.

© CIT